
Guide
Your own SMTP server lets agencies, franchises, and higher-volume teams send loyalty email through their provider with no 7Stamp Email limit.
Your own SMTP server is the sending method for teams that already have an email provider or want campaign email to be unlimited inside 7Stamp. It is part of the Own Channel / Branded Emails add-on.
Email sent through Your own SMTP server is unlimited and never counted against the plan’s Emails limit. Your provider handles delivery, and 7Stamp uses the SMTP connection to send the campaign.
What you need before setup
Prepare the SMTP details from your email provider:
- SMTP host.
- SMTP port.
- Encryption mode.
- Username.
- Password or app password.
- From name.
- From email.
- Optional Reply-to address.
Providers that can work include Google Workspace, Microsoft 365, Amazon SES, Postmark, SendGrid, Mailgun, and other SMTP-compatible services.
How to connect SMTP
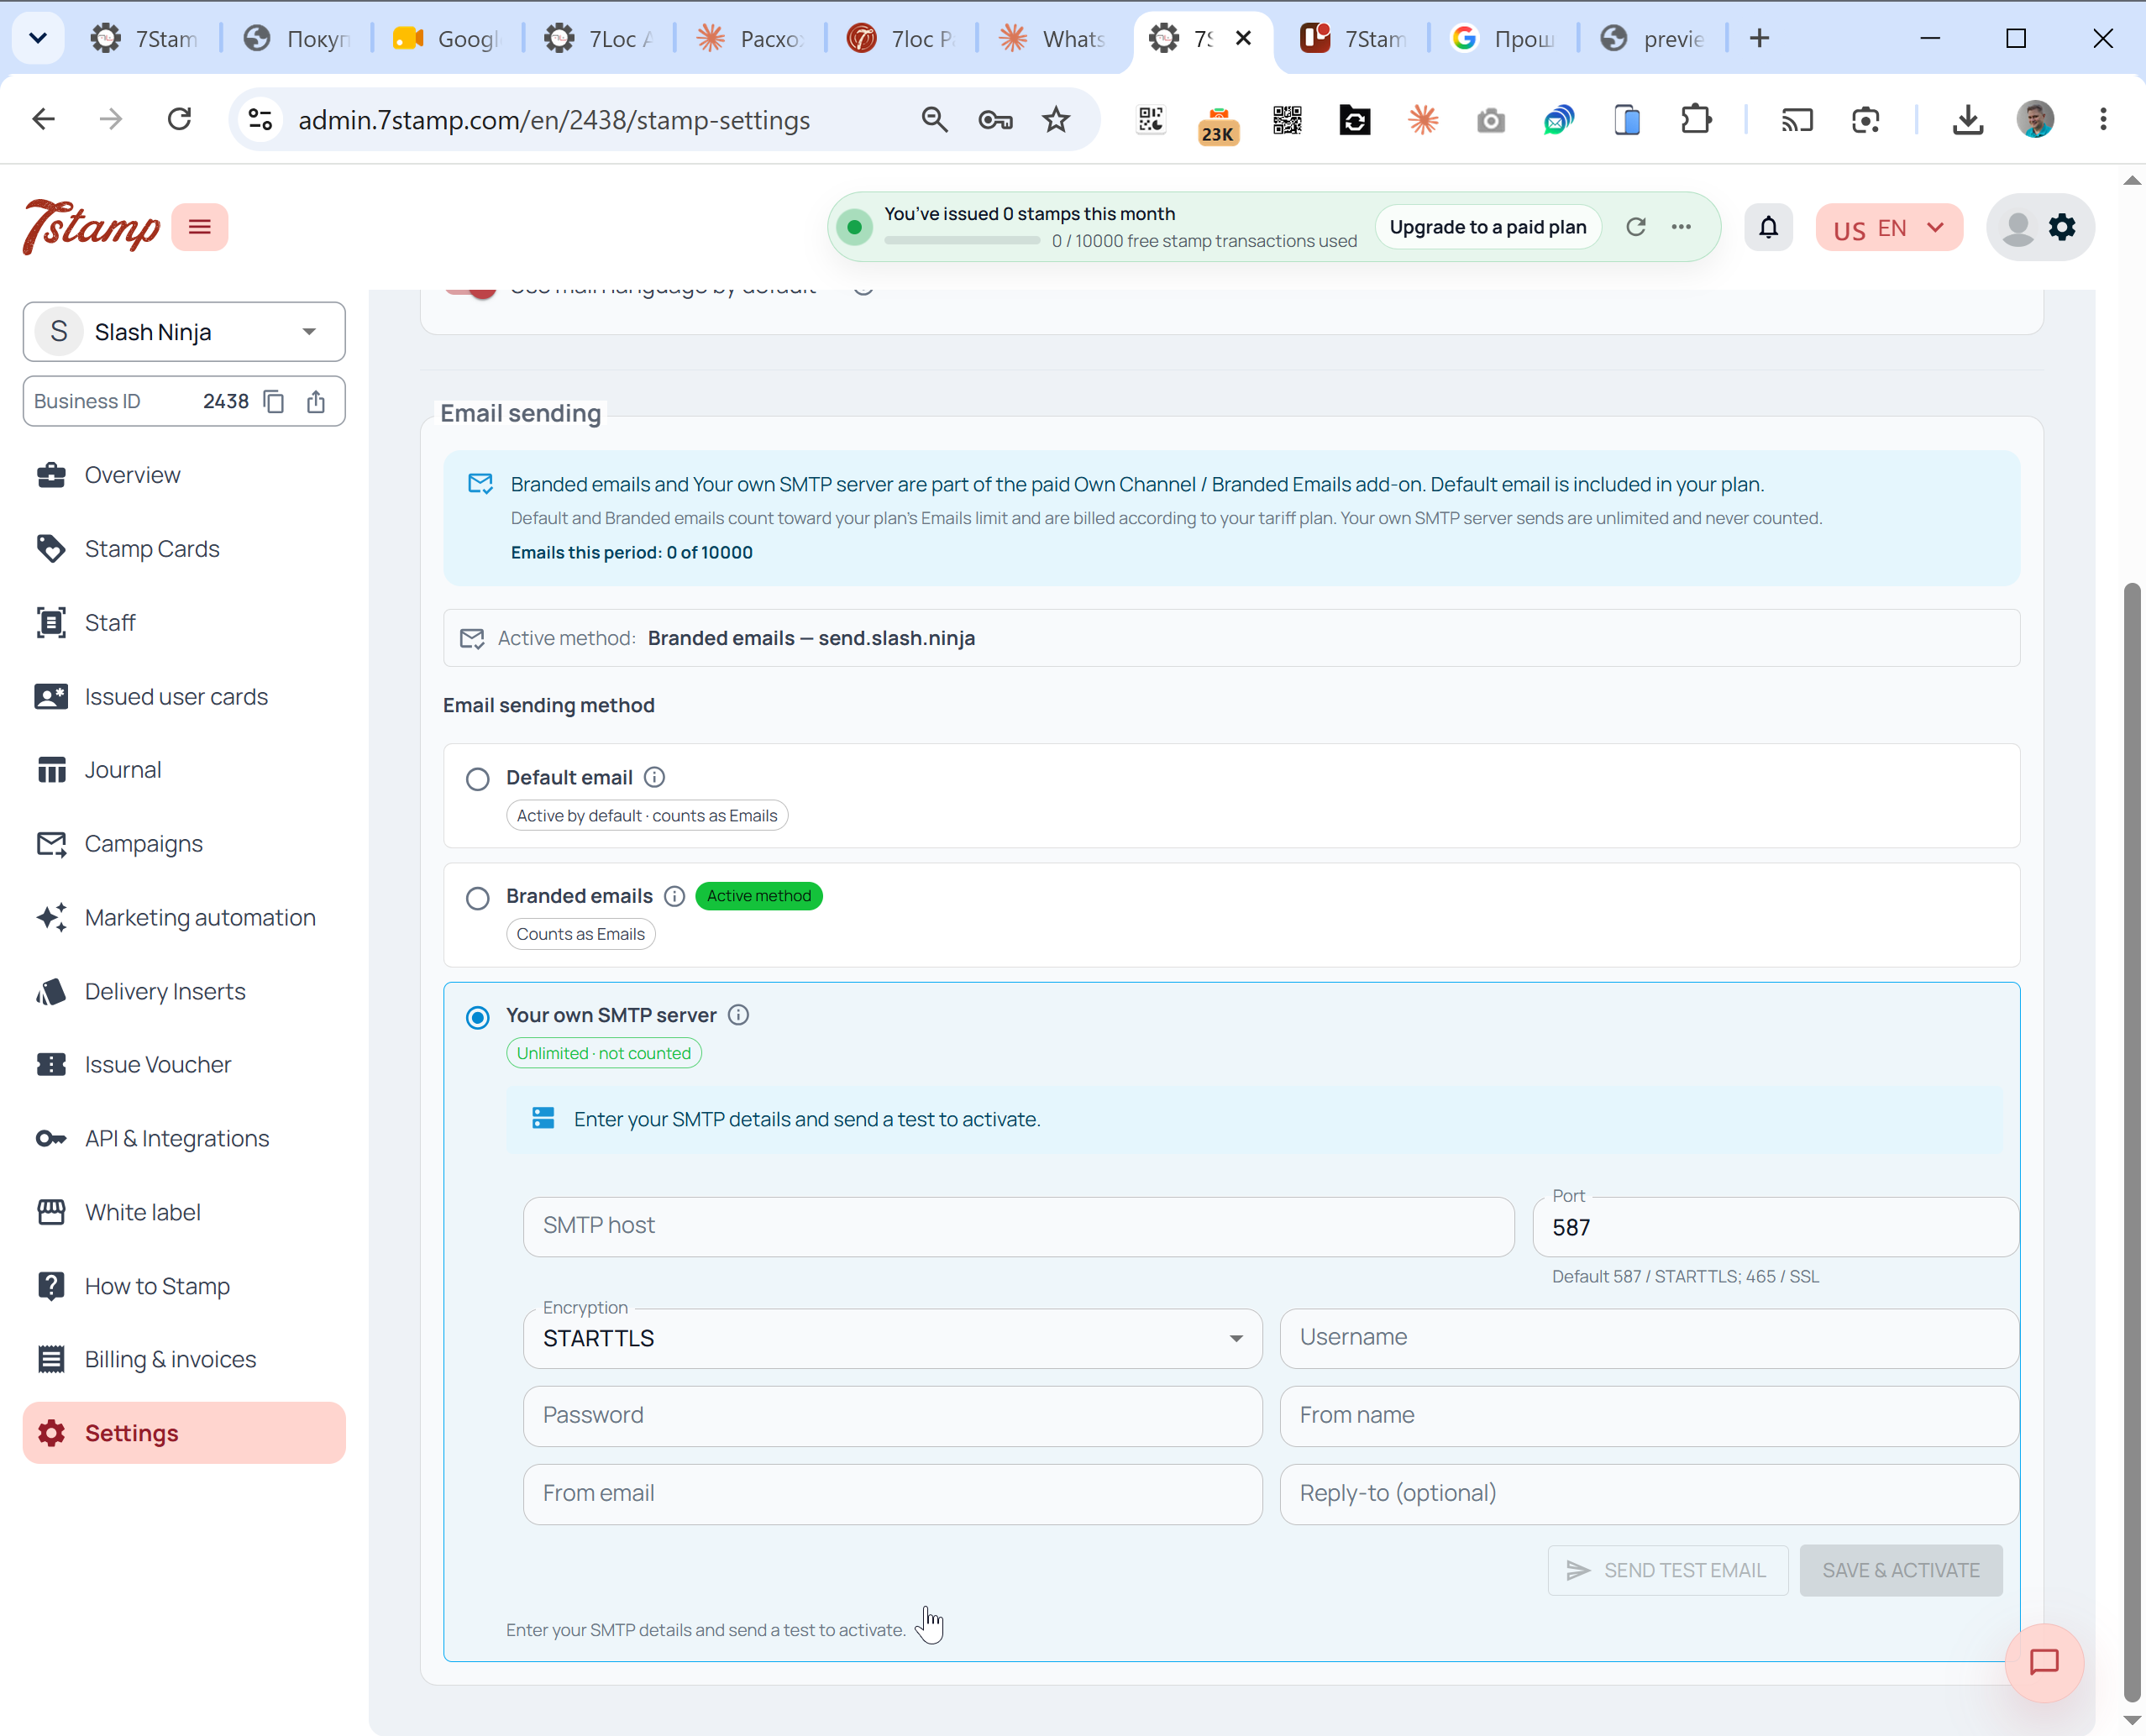
- Open Settings -> Email sending.
- Choose Your own SMTP server.
- Enter the SMTP host, port, encryption, username, and password.
- Add the From name and From email.
- Add a Reply-to address if replies should go somewhere else.
- Send a test email.
- Enable the method after the test succeeds.
Why use your own SMTP?
Use Your own SMTP server when:
- You already have an approved email provider.
- You send higher campaign volumes.
- A franchise or agency wants one sender identity across many locations.
- You want 7Stamp campaign email to be unlimited and never counted.
- Your compliance or deliverability process requires a specific provider.
If you do not want to manage SMTP credentials, use Branded emails instead. Branded emails send from your verified domain while 7Stamp handles delivery, but they count toward your plan’s Emails limit.
Wallet push notifications are separate from email. Wallet push is unlimited and free on every plan.