5. Card Designer — card builder (5 steps)
When you create a new card (by pressing NEW STAMP CARD), you can pick a visual template close to your style. At the top you can quickly switch between business types (e.g., restaurants) or scroll through all of them. Don’t worry if you pick the wrong one: every color and icon is customizable! After you pick a template, it’s copied into your new card and you land in Card Designer. You can skip this step — just press Start From Scratch. You land in the same Card Designer.
Card Designer opens both when creating a new card and when pressing the ✏️ Edit icon on an existing card. It’s a step-by-step wizard of five stages:
- Personalize your style — style and branding.
- Add Visuals — stamp configuration.
- Build Your Journey — Rewards and Milestone Rewards.
- Additional settings — Birthday and Geo-fence notifications.
- Result — final preview and card regeneration.
On the right of the screen there’s always a live Preview stamp card — it updates in real time with every change. You can tap any step in the preview’s bottom navigation to see how the card will look when the user reaches that stamp.
5.1 Step 1. Personalize your style — style and branding
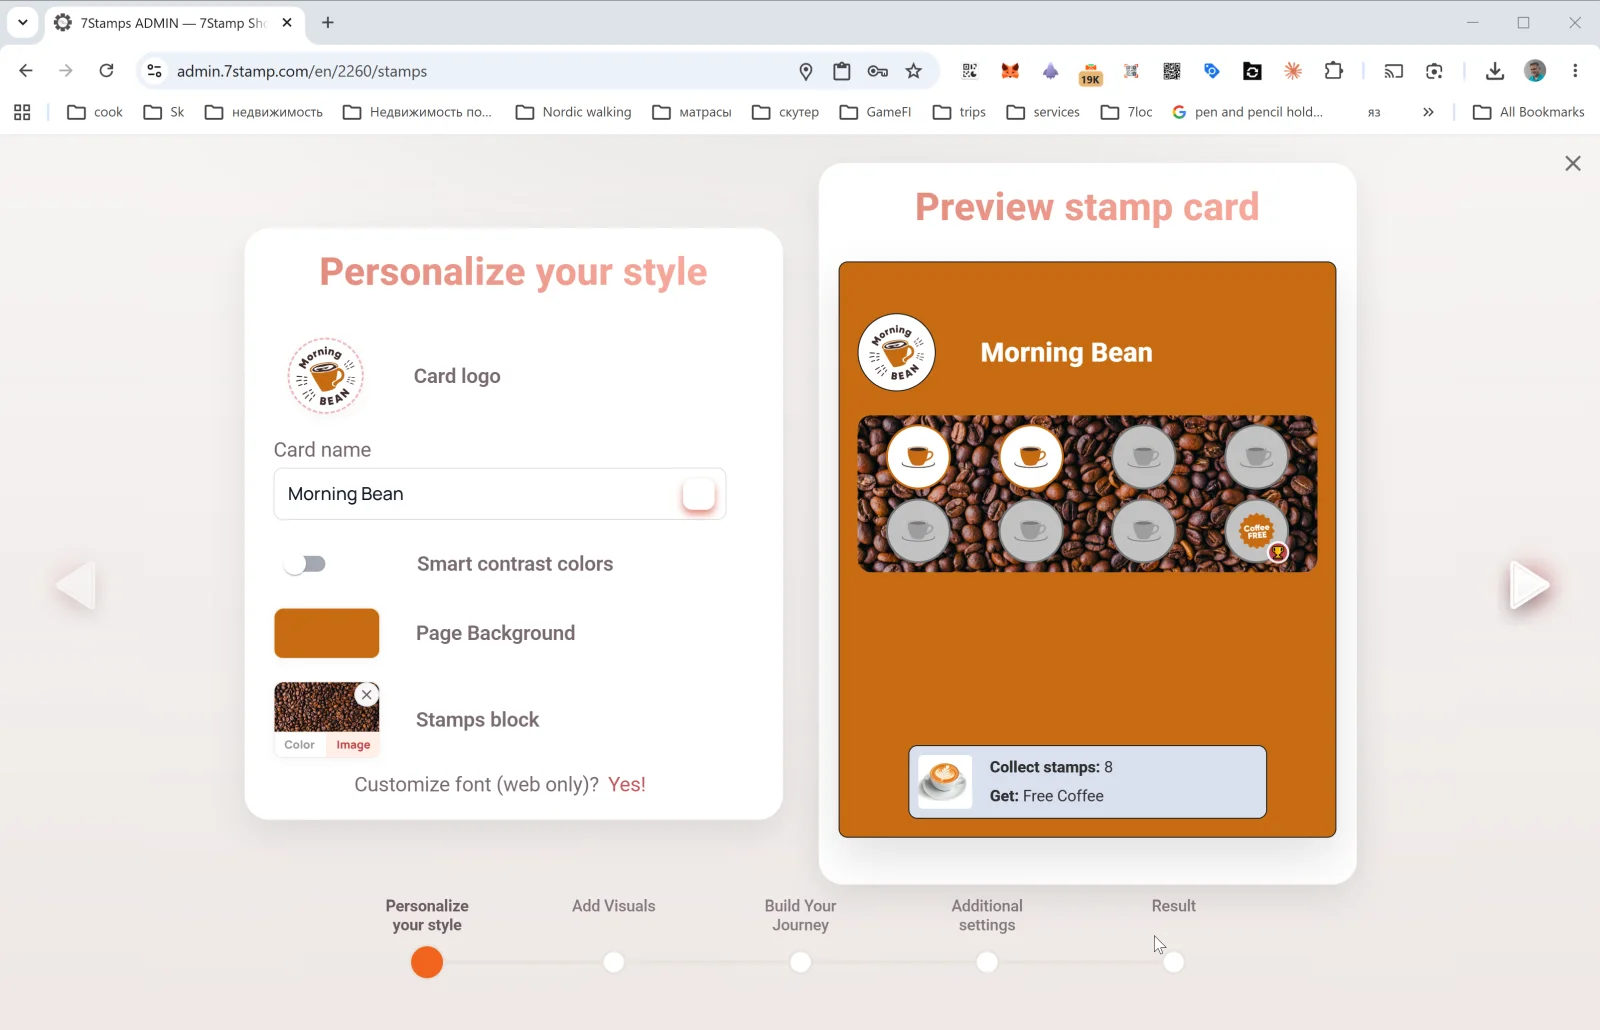
The first step configures the look and branding of the card:
- Card logo — your business logo (uploaded from a file or pasted from clipboard).
- Card name — the card name (e.g.,
Morning Bean,Beauty Salon Loyalty,Free Pizza Club). This is what the customer sees in Wallet. - Smart contrast colors — toggle for automatic contrast color picking (recommended if you’re not sure about your palette). When enabled, the system will adjust colors automatically if they blend together.
- Page Background — the card page background color.
- Stamps block — the background of the stamps block itself, switching between Color (solid) and Image (uploaded picture — e.g., a coffee beans photo for a coffee shop).
- Customize font (web only)? Yes! — font customization (applies only to the web preview; Wallet uses the system font).
Good card design rule of thumb: the logo must be readable in a small size; the background should be solid or low-contrast, otherwise stamps are hard to read. Before publishing, always tap View as Customer and check how the card looks on a real phone screen.
5.2 Step 2. Add Visuals — stamp configuration
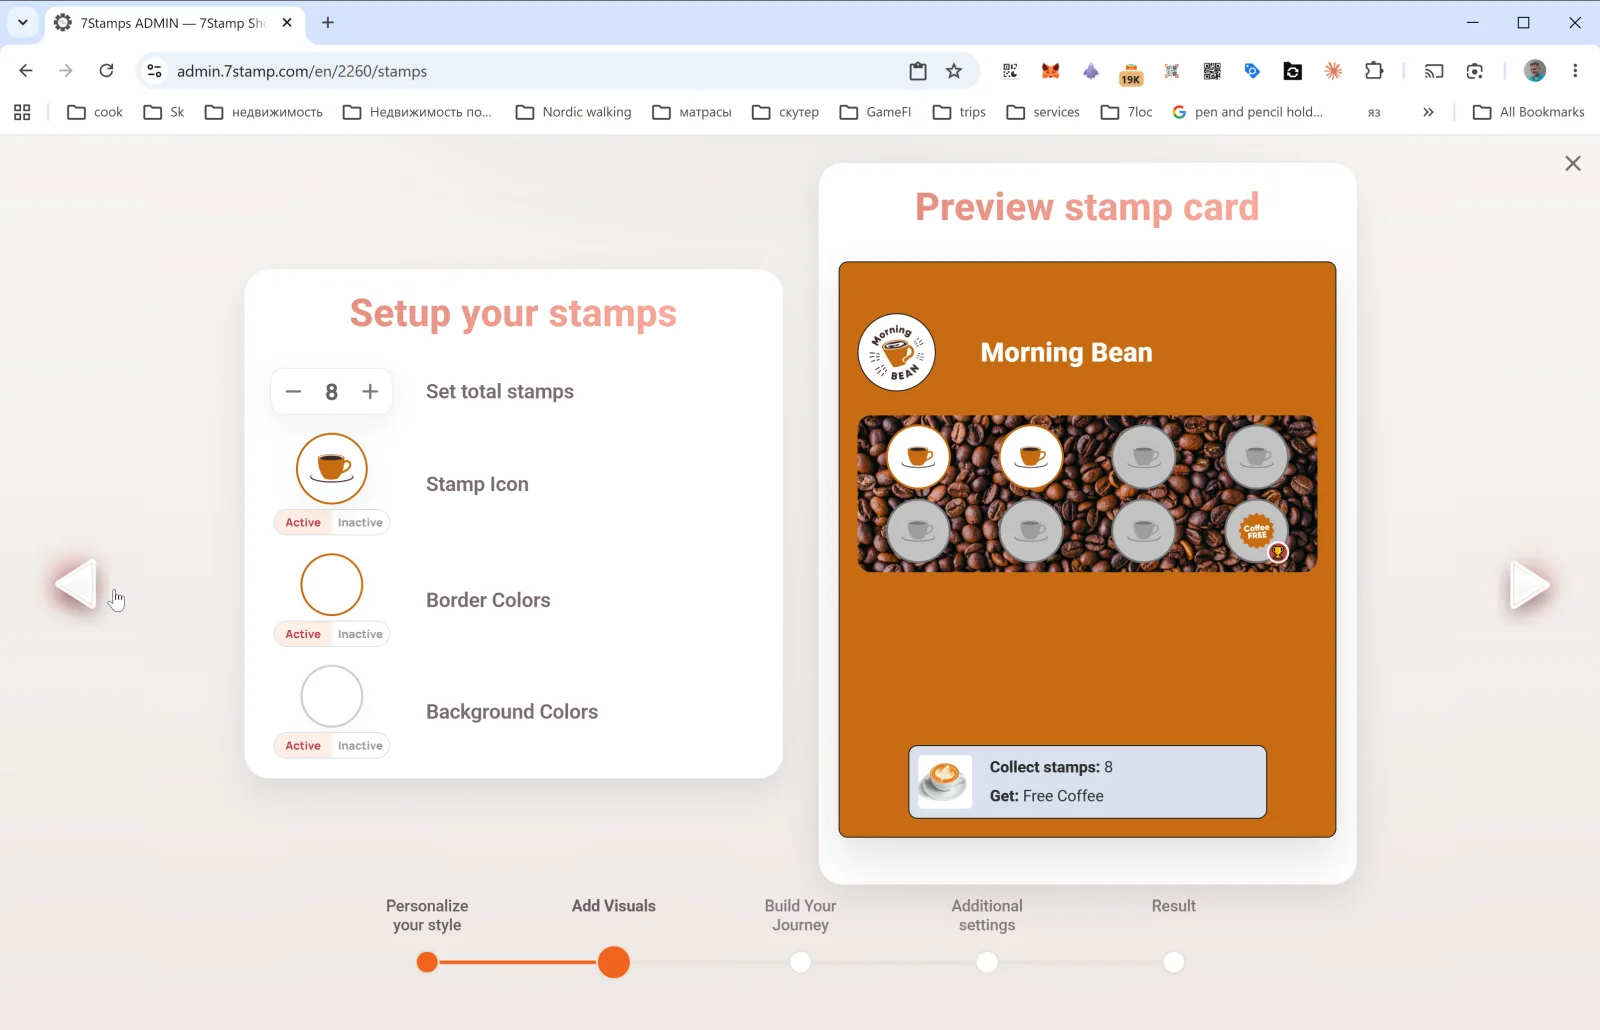
This step configures how stamps look:
- Set total stamps — total stamp count on the card (e.g.,
8). This is the final goal — when the customer reaches this count, the Reward fires. - Stamp Icon — the stamp icon. Uploaded separately for Active (filled) and Inactive (empty) states. A nice trick is to use the icon of your main product (a coffee cup, a pizza, scissors) for active, and a gray version of the same image for inactive.
- Border Colors — stamp border color for active and inactive states.
- Background Colors — stamp background color for active and inactive states.
A card with 8 stamps is a sweet spot for coffee shops and quick service. For premium services (salons, restaurants) 4–6 stamps are typical. For frequent purchases (bakeries, fast food) — 10–12. Don’t go above 15 — motivation drops and the voucher starts to feel unreachable.
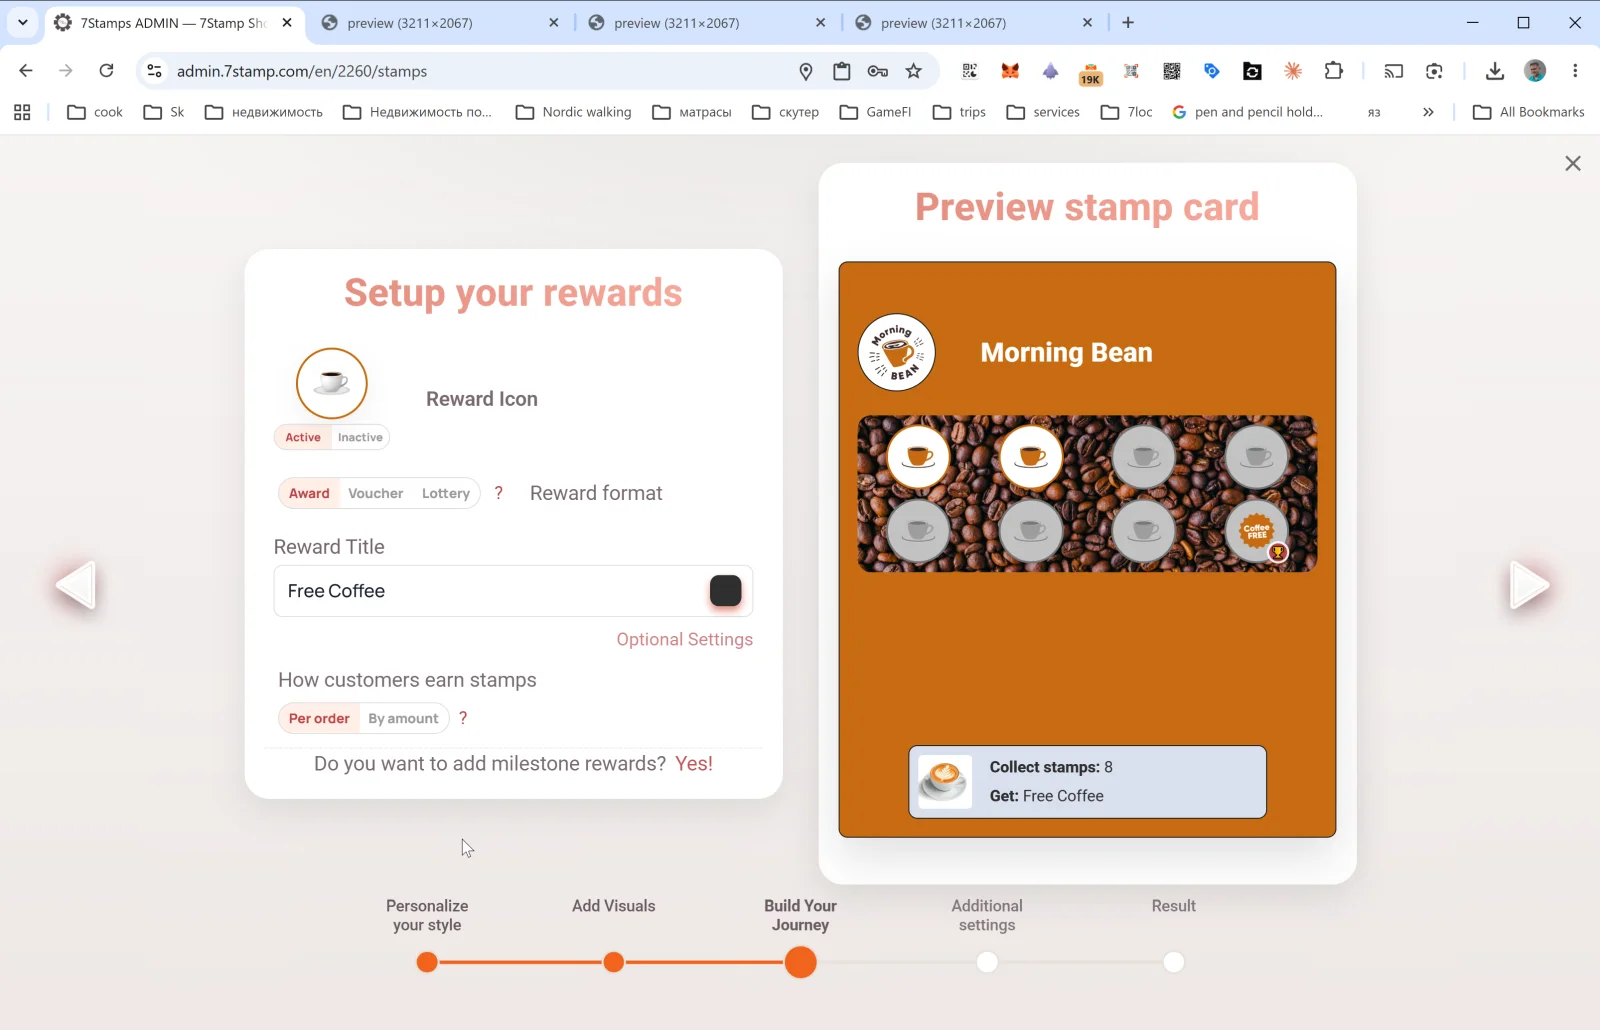
5.3 Step 3. Build Your Journey — Rewards and Milestone Rewards

The most important step. Here you decide what the customer gets and how they earn it.
Reward Icon
The reward icon (Active / Inactive) — shown in the final cell of the card in place of the standard stamp.
Reward format
Toggle of three options: Award | Voucher | Lottery. These are the three Reward types — each has its own Section 6. In short:
- Award — an instant text gift (“Free Coffee”). Simple and fast.
- Voucher — a Smart Voucher with its own lifecycle and an optional Redeem Code.
- Lottery — a draw from a pool of variants with probabilities.
Reward Title
The text of the final gift (e.g., Free Coffee, Free L'Oréal Hair Coloring, 50% off tire replacement). This is what the customer will see all along the path — both in Wallet and in the preview.
Optional Settings
Opens the Optional reward settings popup with extra Reward parameters. The contents depend on the selected type (see Award, Voucher, Lottery).
How customers earn stamps — stamping rule
Toggle: Per order | By amount.
- Per order — one stamp per ticket / order, regardless of amount. Simple and clear, fits most cafes and salons.
- By amount — one stamp per N currency units in the ticket (e.g., 1 stamp per €10). Good for restaurants and retail with variable ticket sizes — it nudges customers to grow the basket. Requires the ticket amount to be passed to 7stamp (via POS integration or Receipt QR).
Do you want to add milestone rewards? Yes!
This link turns a single-goal card into Milestone Rewards — a card with several intermediate gifts. For example: 3 stamps → small gift, 6 → medium, 9 → final reward. Details in Section 6.4.
5.4 Step 4. Additional settings — Birthday and Geo-fence
This step opens automations — things that work without your involvement after the card is published.
Birthday Rewards
- Enable birthday greetings — Yes / No.
- Greeting message — the greeting text (e.g.,
Happy Birthday! 🎉). - Congratulations before N days — how many days before the birthday to send the greeting (
0= on the day,3= three days before). - Give birthday voucher — Yes / No. If Yes — a voucher is automatically issued together with the greeting.
The birthday date is collected from the customer’s card — the customer can set it at join time or later on the card page.
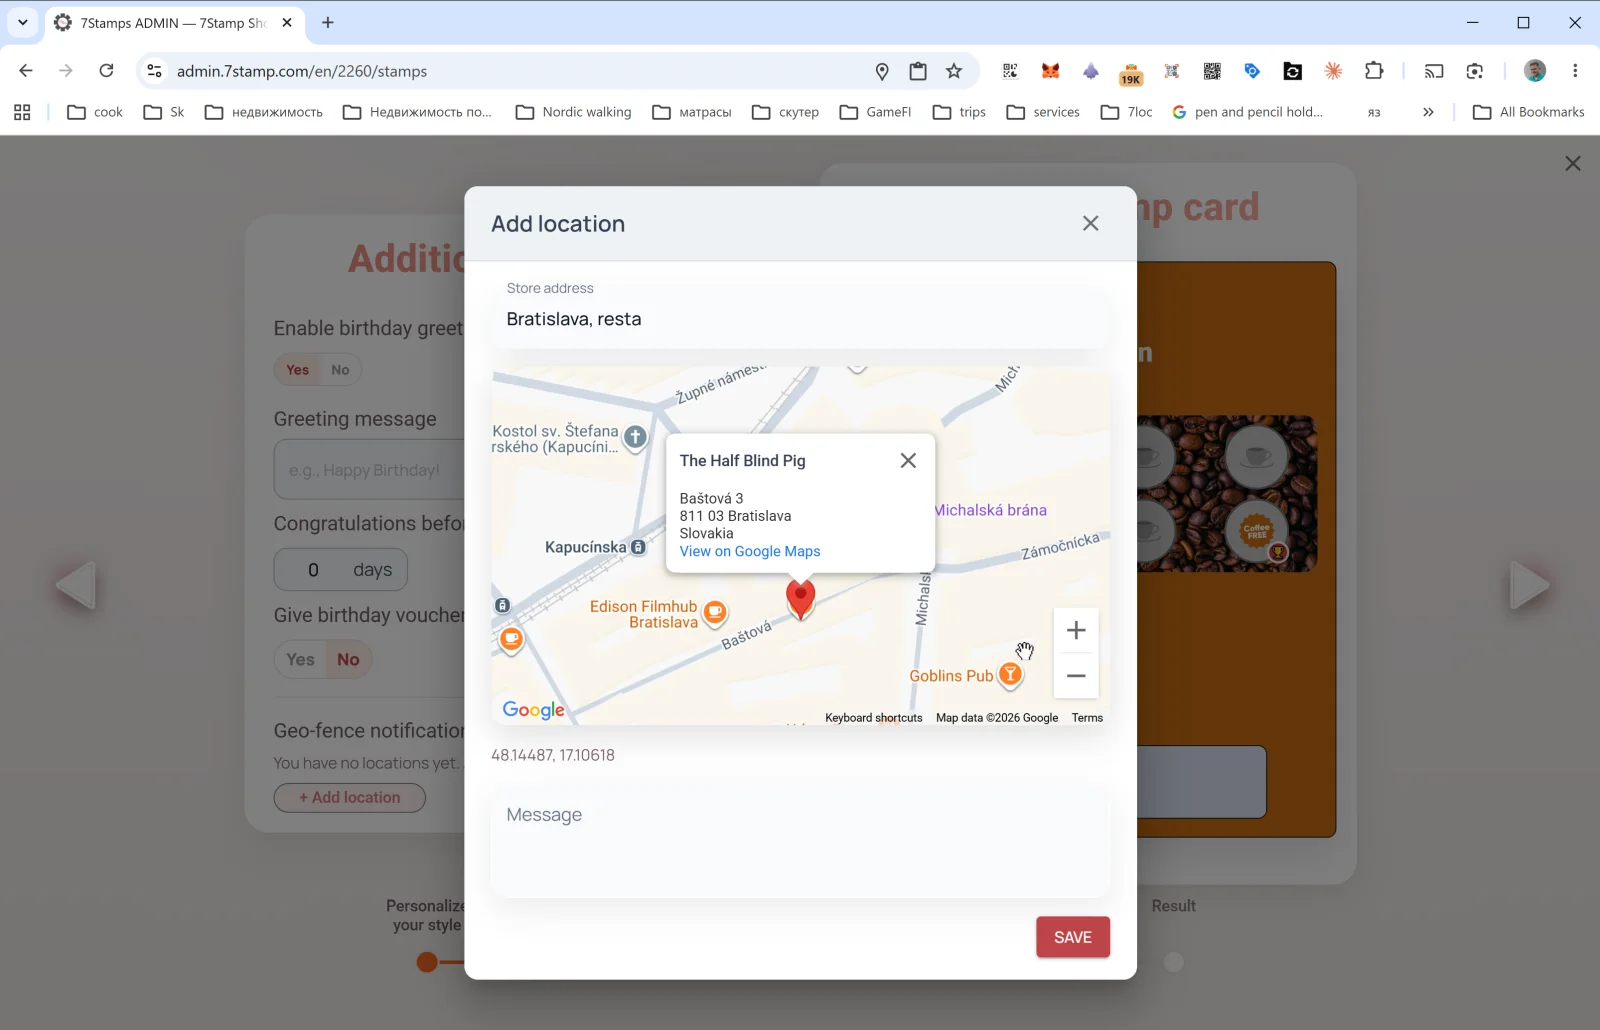
Geo-fence notification — geo-reminders
In Geo-fence notification it’s empty by default: “You have no locations yet”. Tap + Add location — the Add location popup opens:
- Store address — enter the venue address (e.g.,
Bratislava, Baštová 3). Google Maps suggests as you type. - A marker appears on the map; refine the spot. Coordinates are recorded automatically (e.g.,
48.14487, 17.10618). - Message — the text of the notification the customer gets when nearby (e.g.,
You're nearby! Drop by for your morning coffee ☕).
You can add several locations — the geo-fence fires for any of them.
Watch out. Geo-notifications only work if the customer has enabled geolocation and Wallet push notifications. Don’t use this channel for aggressive promos — keep the tone warm and non-intrusive.
5.5 Step 5. Result — final card regeneration
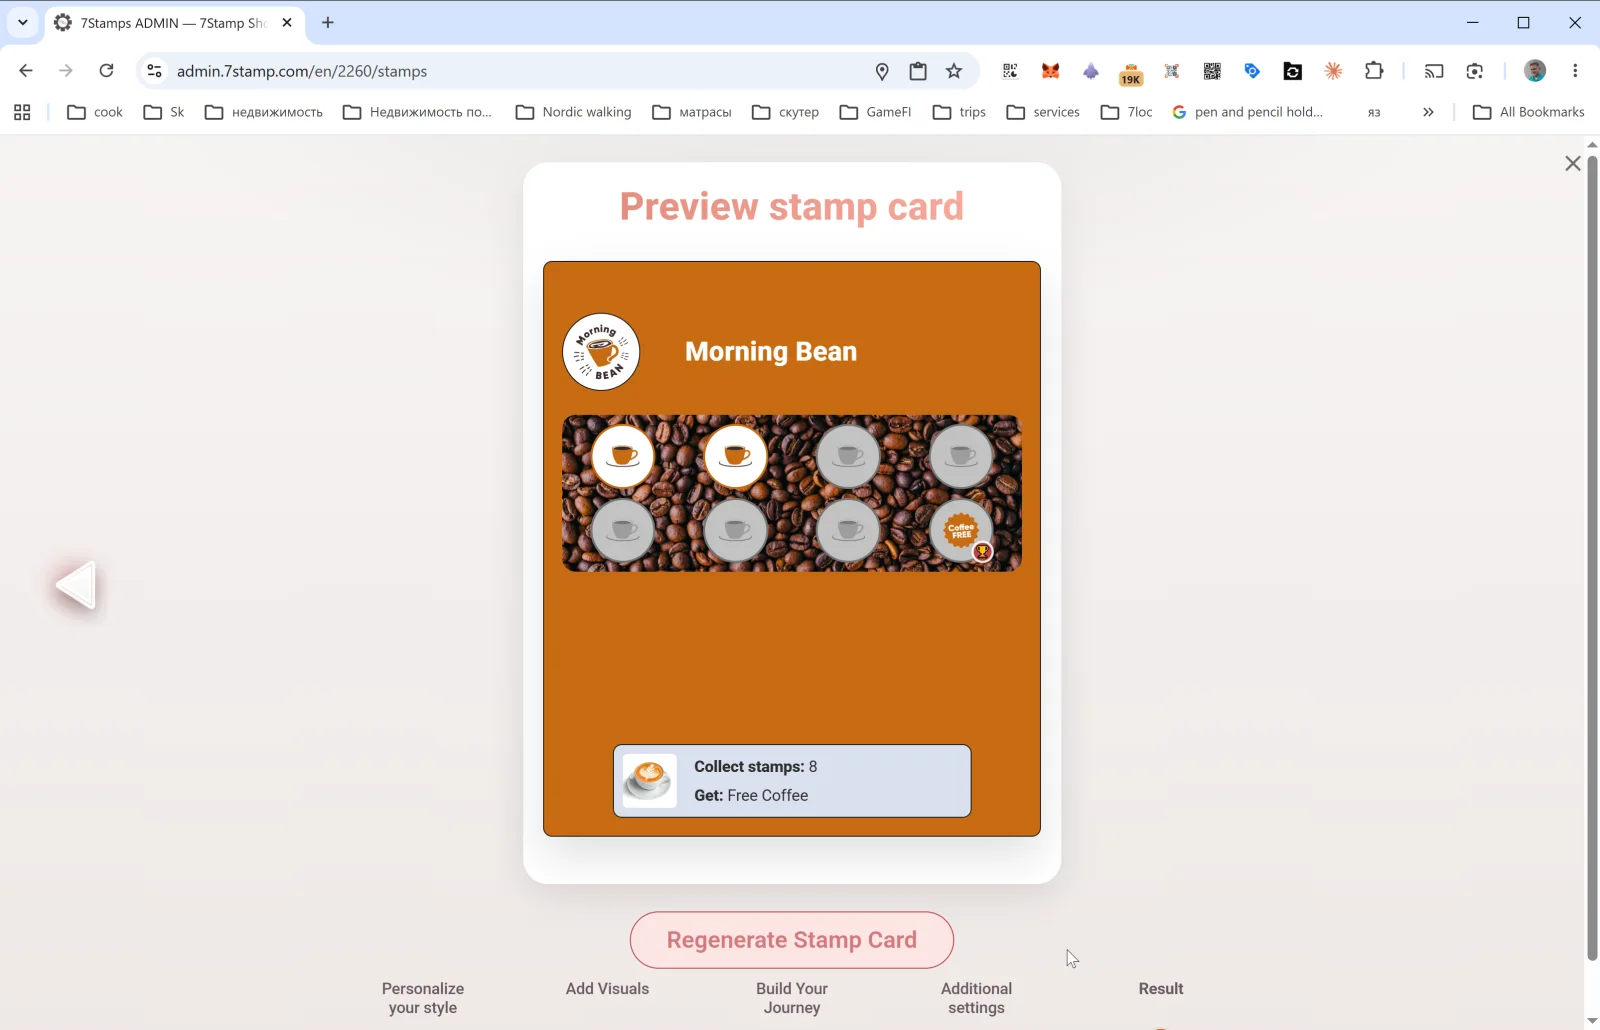
On the last step you see the final Preview stamp card and the Regenerate Stamp Card button.
- When creating a new card, the button simply publishes it — after the press the card appears in the Stamp Cards gallery and the QR starts working.
- When editing an existing card, Regenerate Stamp Card applies all changes and updates the design on every already-issued customer card (via Wallet push update). Color, text, and icon changes reach customers automatically.
Important about editing. Change the design boldly — it updates for customers. But don’t change the underlying mechanics (stamp count, Reward type) on a live card: it confuses existing participants. If you need different mechanics, create a new card and archive the old one.
Visual walkthrough
Use the screen sets below as a visual companion to the article. Open any image to inspect it at full size.