7. Card distribution channels
A card is not an app you have to download; it’s a web page (the Join Page) + an Apple Wallet / Google Wallet pass. To get the customer to that page, you need an entry point: a QR code, a direct link, a printable insert, and so on. 7stamp supports every major distribution channel — use the ones that fit your business. Often several channels work in parallel.
7.1 Printable QR labels (two formats)
From the 🖨️ icon under a card in the Stamp Cards gallery you can export a QR label in one of two formats:
- 4×6 in / 10×15 cm — large format. Good for posters, entrance signs, info stands, in-room banners.
- 2×2 in / 5×5 cm — small format. Good for table tents on every table, stickers on packaging, small cards in every order.
For each format there are two options: Download (download PDF/PNG to print at a print shop) and Print (send directly to a printer).
Place the QR where the customer is already pausing: at the till, on the table, in the restroom, near the exit. Don’t put the QR far from the queue — the customer should be able to scan it while they wait, not remember about it later.
7.2 Direct link (Join Page)
From the ⤴️ icon under a card → Copy Join Page Link. It’s a public URL to the card you can paste:
- Into the Instagram bio and Stories.
- On a website or landing page (a “Get loyalty card” button).
- In staff email signatures.
- In a newsletter or a welcome email.
- On the delivery site menu or as a link in a QR menu.
The same Join Page works on both iOS and Android — the system automatically offers to save the card to Apple Wallet or Google Wallet depending on the device.
7.3 View as Customer — preview through the customer’s eyes
From the ⤴️ icon under a card → View as Customer. Opens the card page exactly as the customer will see it: with the real design, the Add to Wallet button, and the whole UI. Use this before publishing to verify that:
- The logo is readable on a small screen.
- The stamp progress is visible at first sight, without scrolling.
- The Reward Title fits and is understandable.
- Colors don’t blend with each other.
7.4 Staff QR Page — a staff card with an enrollment QR
From the 🔳 icon under a card → Open Staff QR Page or Copy Staff QR Page Link. It’s a separate page that generates a QR for customer enrollment. The staff member:
- Opens the Staff QR Page on their phone (or saves it to Apple/Google Wallet as their own pass).
- When taking payment / serving the customer, shows the QR screen to them.
- The customer scans it with their phone camera and saves the card.
This scenario is ideal for premium service — beauty salons, sit-down restaurants, barbershops, spa. Unlike a QR poster, there’s a human touch — the staff member can explain the program and answer questions.
7.5 Delivery Inserts — printable inserts for delivery orders
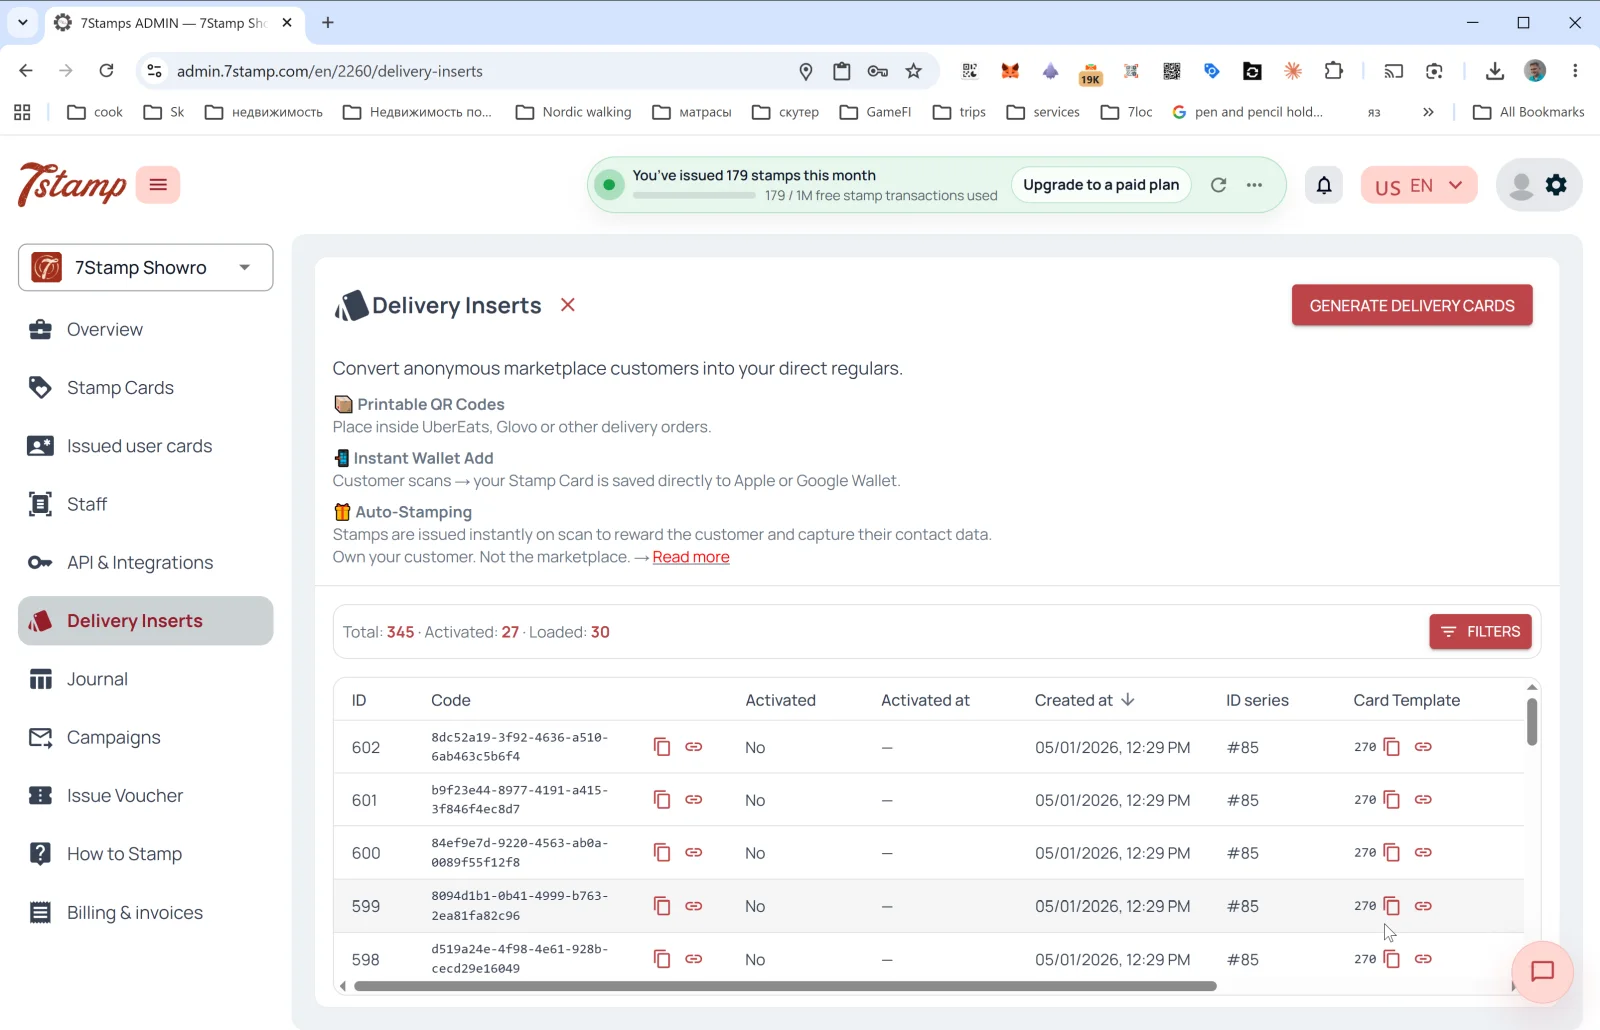
Delivery Inserts is a dedicated side-menu section. The main job: turn anonymous marketplace customers into your direct customers (Glovo, UberEats, Wolt, and other aggregators don’t share contacts with you — Delivery Inserts solve that).
What’s inside:
- 📦 Printable QR Codes — printable QR codes to put inside an order.
- 📱 Instant Wallet Add — once scanned, the card saves to Apple/Google Wallet instantly.
- 🎁 Auto-Stamping — stamps are added automatically right at the scan.
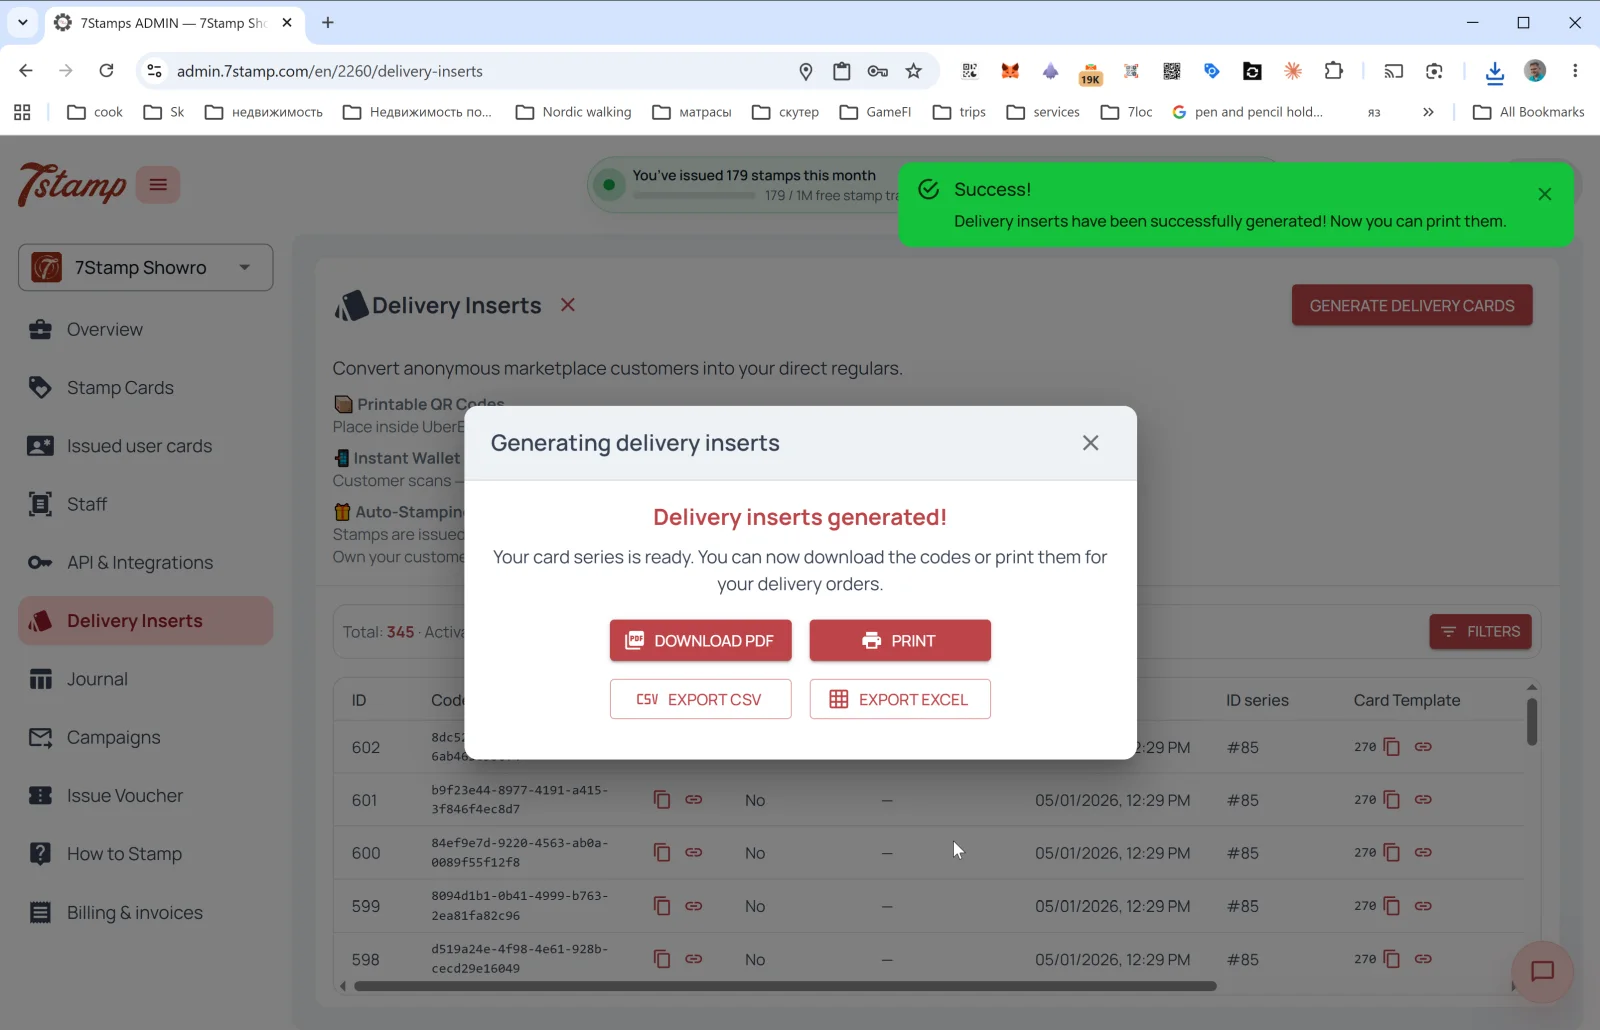
How to generate a batch
Press GENERATE DELIVERY CARDS in the upper right — the Generating delivery inserts popup opens:
- Stamp Card Template — pick the card the inserts are tied to.
- Reward type — choice between STAMPS COUNT (give N stamps per scan) and PURCHASE AMOUNT (give stamps proportionally to the purchase amount, if the rule is
By amount). - Stamps count — how many stamps to add (e.g.,
1). Allowed range: 1 – N (where N is the total stamps on the card). - Number of codes to issue — how many unique codes to generate at once (1–100).

After generation, the Delivery inserts generated! window opens with four export buttons:
- DOWNLOAD PDF — for printing at a print shop or on a printer.
- PRINT — direct print.
- EXPORT CSV — for import into CRM or an external tool.
- EXPORT EXCEL — for office processing.
Issued inserts table
On the main Delivery Inserts page you see stats: Total / Activated / Loaded and a table of all issued codes with columns:
- ID — sequence number.
- Code — the insert UUID (can be copied or opened as a page).
- Activated — used or not (
Yes/No). - Activated at — activation date.
- Created at — generation date.
- ID series — batch (e.g.,
#85). - Card Template — the card it’s tied to.
The FILTERS button lets you filter by activation, date, series.
Tip. Print inserts in batches of 50–100 and put one in every delivery order. The insert design should plainly say what the customer gets: “Scan this code → Save the card → Get a free coffee on your 9th order”.
7.6 Receipt QR — QR on the receipt or pre-check
Although there’s no dedicated Receipt QR menu item in the admin (it’s implemented as a Delivery Insert printed on the receipt or via POS integration), the scenario is the same in principle:
- The QR is printed on the receipt / pre-check / order confirmation email.
- The customer scans after paying — the card is issued (if not already saved) and stamps are added for the completed purchase.
- No staff-side software is required — this is pure Zero-Level Integration.
- If the scan triggers a Lottery, it’s spun right in the customer’s phone browser on the card page — no app to install.
You can generate one-off receipt codes via Delivery Inserts (Reward type = STAMPS COUNT or PURCHASE AMOUNT). For a persistent QR on the receipt, either print one Join Page QR on every receipt (in which case stamps are not added automatically — the customer only joins), or connect a POS integration.
7.7 Individual links from CRM and API issuance
Via the API (see Section 14) you can:
- Programmatically create personal card links for specific customers from your CRM.
- Issue cards with stamps (e.g., if a customer made an offline purchase and you want to chase them up with a follow-up campaign).
- Import customer segments and send personal invites.
Visual walkthrough
Use the screen sets below as a visual companion to the article. Open any image to inspect it at full size.